I had been seeing these ideas on interest for Christmas card holders with a message at the top and ribbons hanging down. I thought they were cute but didn’t think anything of it because I had two things that I have used to hold Christmas cards in the past. Then I got out my Christmas decorations and realized one of those holders broke and I threw it away after last Christmas. The other I keep hanging year round with baby announcements, birthday invitations, etc on it and I didn’t want to take that stuff down for the holiday. So I tried to figure out what to do and I remembered those items and thought I’d see what I could come up with from the supplies I had in hand.
I went “shopping” around my house and found a decorative plaque that I wasn’t really using, some Amy Butler fabric that I got for a skirt for Charlotte that I never made, ribbon (which I always have plenty of in my craft closet), a glue gun, a foam piece that I accidentally bought the wrong size for another project, and clothespins from yet another undone project. Turned out good for me that I had a hard time finishing projects that I bought for this year! You could really make this with anything, these are just the things that I found around our house and used. You can definitely change this project to fit your supplies.
So here, in a nutshell, are instructions for how I made, what I must say, turned out to be a really cute Christmas Card holder! I’m just going to put my supplies, etc but remember that this would be really easy to customize!
Christmas Card Holder
Step 1. Gather up what you have at home or what you bought for the project.
Items you will need:
A sturdy item to back the top portion with
A piece of foam
Fabric
Scissors
Ribbon
Glue Gun
Sharpie or pen
Clothespins
Step 2. Lay the sturdy backing item on the foam and trace.
Step 3. Cut the foam to the size of the backing item.
Step 4. Hot glue the foam onto the backing item. It doesn’t have to be secured so that it wouldn’t even fall off if your kid was trying to pull it off. The fabric will secure it again so just secure as best as possible and move on.
Step 5. If your fabric isn’t already ironed, iron it.
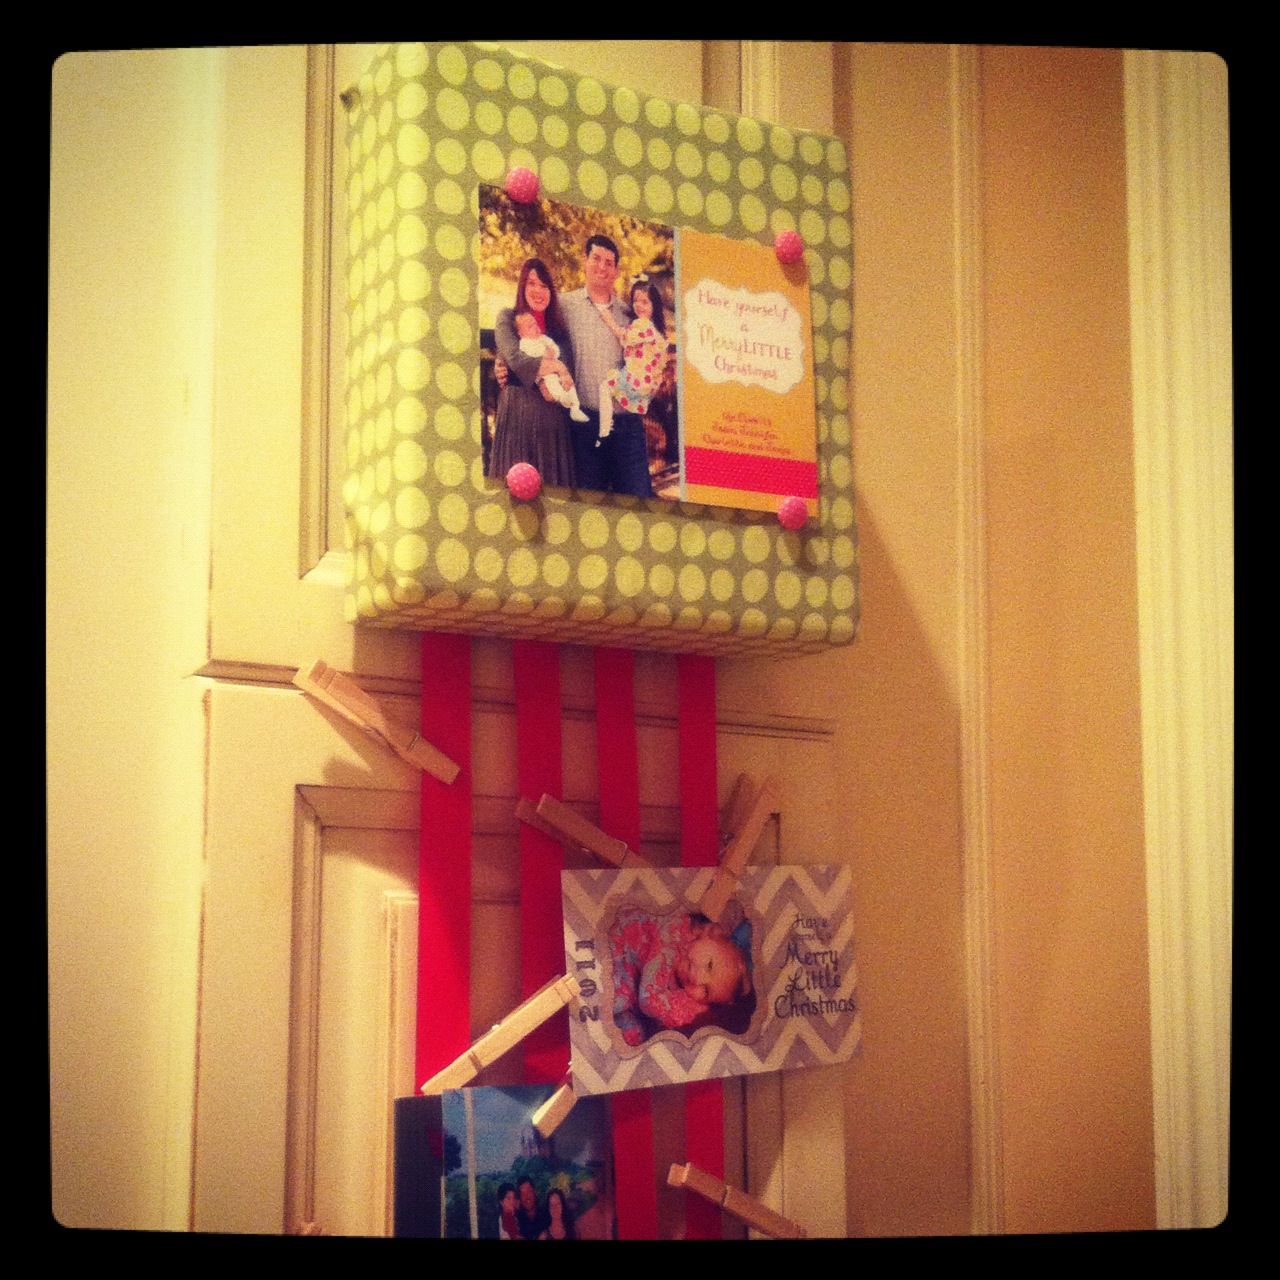
Step 6. Start hot glueing your fabric to cover your foam and backing. I just worked my way around it almost like wrapping a Christmas present. I would try and leave two sides straight with no folds so you can put them on the sides (I, of course, didn’t think about that until mine was already hung with my straights sides for the top and bottom, but you can do it better!).
(next few steps I forgot to take pictures)
Step 6. Once you get the top portion finished cut ribbon to an appropriate length. Don’t worry too much about them being equal. You can trim them to equal lengths once you hang it.
Step 7. Hot glue the ribbon to the bottom back of the top piece.
Step 8. Hang!
Note: When choosing the sturdy piece for your backing you might want to choose something that is already made to hang like I did. That makes this step a breeze! Also, have some of those stick on hooks on hand at all times. I use them for almost everything and they worked great for this!
Step 9. Finish accessorizing.
If I had wanted to spend more time on this I might have monogrammed the fabric before I put it up. I’ve seen some on pinterest that have sayings painted on too. But I didn’t want to spend more time so I just did it as quick as I could. Once I got it up there I realized I had some cloth covered push pins and so I put our Christmas card on the top. Looks pretty cute and (hopefully!) the pins won’t fall out! I also went ahead and put all my clothespins on. I probably stuck too many on but as it’s filling up with cards it looks less bare. I probably would have spaced my ribbons out more (or only done 3) if I did it again but this works good enough for me!
Step 10. Hang Christmas cards!
I have also been saving Christmas cards from years past and I love looking at the pictures on them to see how people grow up (I only save the pictures usually). I also saw on interest some people making books out of theirs with binder rings and so I thought I’d try it. I want to get some smaller rings so that I can have a book per year but for now I just put both years that I saved into one and put our Christmas card at the front of each year’s so that I can tell where one year starts. Super cute and makes it a lot easier to flip through rather than just putting them in a bowl!